The Perimeter theorem, even though being an unusual origami concept, is very intuitive and easily applicable. I believe that anybody interested in understanding origami should apprehend that exciting concept.
I had never intended to write about the perimeter theorem until I wrote the blog post “Hatsune Miko and colour change”. But since the very first question I got about that blog post was related to the strangely looking crease pattern of irregular polygons (shown there), I have decided to dedicate this blog post to that problem. You see, the rule or theory behind those strangely shaped polygons, or to be more precise, behind strangely looking crease patterns, is better known as the Perimeter theorem.
So, let’s look at the example analysed in “Hatsune Miko and colour change” blog post, again.
An Example
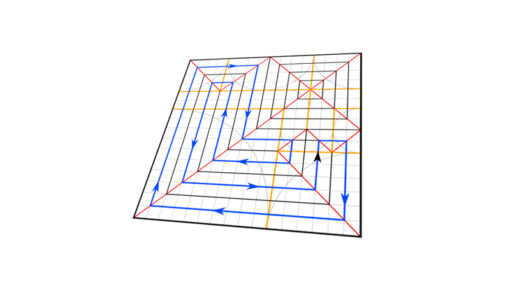
In figure 1, you can see the very same flap and its crease pattern, analyzed in the “Hatsune Miko and a colour change” blog post.

Before we begin, you need to understand that not all parts of the crease pattern are equally important. Or simply speaking, the paper area, not visible on the folded model, meaning the paper area that forms inner layers could be designated as less important or even unessential. With this in mind, a major question arises. If some area of the paper is unessential, what would happen if we merely cut that area out. After all, that should be possible since that paper area is not visible.
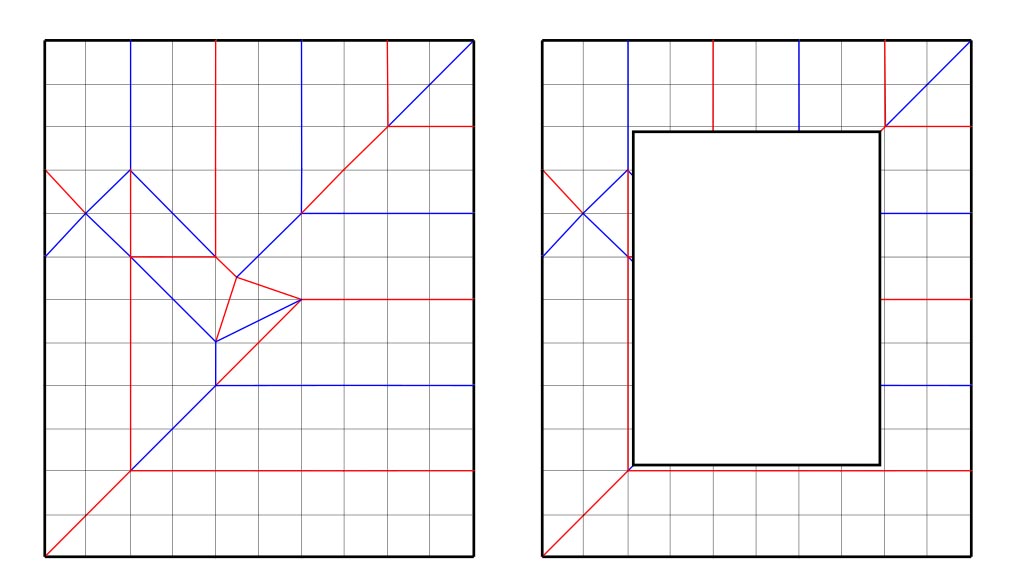
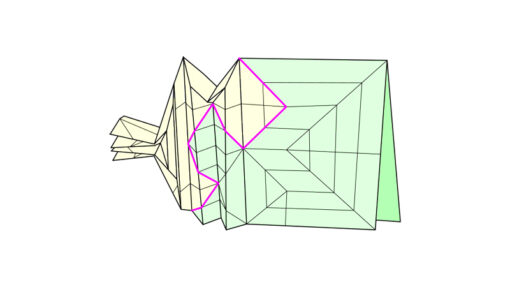
In figure 2, you can see the difference between the two crease patterns. The first crease pattern is the original one. The second one is the same as the first one, except we cut out the hole in the middle. If we fold the second crease pattern, the final result will be almost identical to the first one. Look at figure 3 and compare the result with the original (figure 1). I assume you understand that if you completely flatten the model in figure 3, the result will be almost indistinguishable from the original model in figure 1.
What you just witnessed is a demonstration of the perimeter theorem.
The perimeter theorem states that if the crease pattern on the perimeter is flat-foldable, it is possible to construct a crease pattern inside that perimeter (inside cut-out paper area) that is flat-foldable as well.
In our case, that is obvious because we have started from a complete and valid crease pattern and cut the specific area out. According to the theorem, vice versa is also possible. If we have a crease pattern with a cut-out paper area, and if that crease pattern is flat-foldable, it should be possible to construct the flat-foldable crease pattern inside that cut-out paper area as well.
Construction process
The construction process of the crease pattern inside the cut-out paper area is quite simple. Simply put, only what needs to be done is to extend all the creases from the perimeter toward the centre of the crease pattern (into the cut-out paper area). Of course, by doing so, it is of most importance to obey both Meakawa-Justin and Kawasaki-Justin theorems. That being said, let’s try to do that together.
Let’s start with the crease pattern in figure 4. As you can see, the central part of the crease pattern is erased, thus making it a perfect candidate for this practice. So, let’s extend some of the creases on the perimeter until they collide. Please be aware that several unrelated creases will be extended at once to speed up the process.
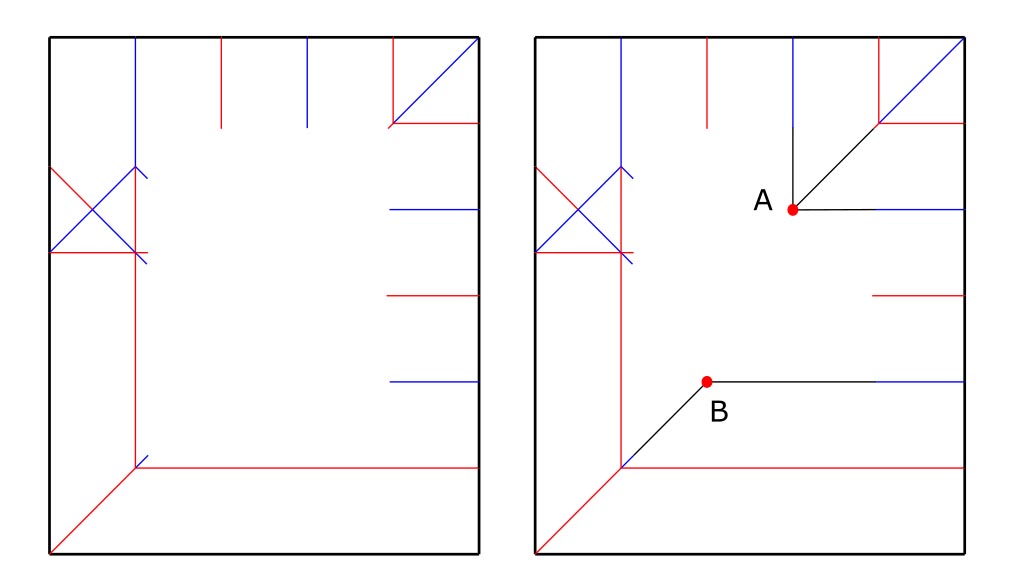
Upon extending a few creases, we will get three creases that collide at point A. At the same time, we will get additional two creases that collide at point B. In these points, it is obvious that additional creases are needed if we want to satisfy the Meakawa-Justin theorem. Please, be aware that in this initial phase, we will primarily focus on the Maekawa-Justin theorem. We will leave the Kawasaki-Justin theorem aside for the moment.
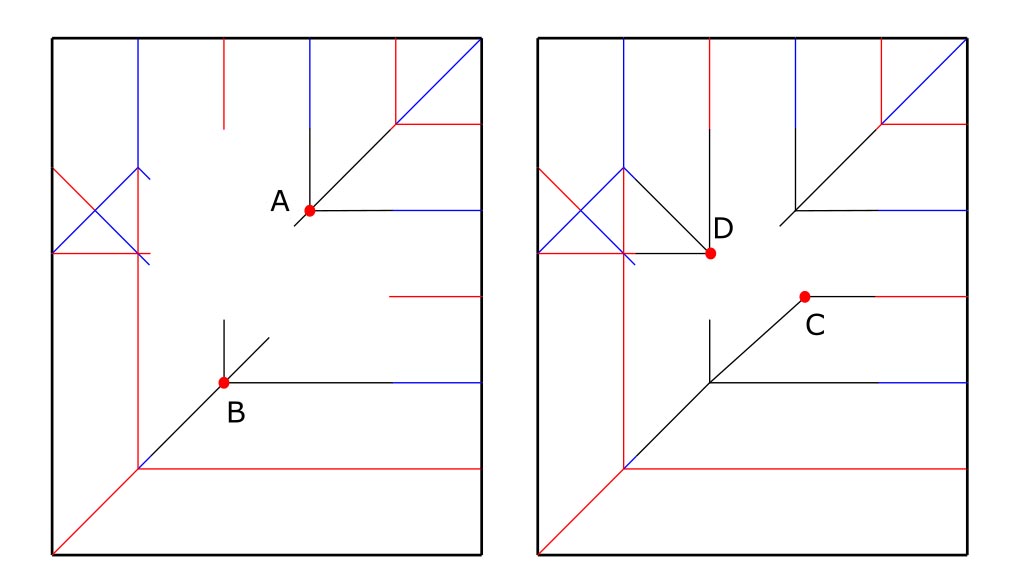
To satisfy the Meakawa-Justin theorem, at point A, one additional crease should be added (figure 5). On the other hand, the situation at point B is more complex because two additional creases should be added. Hence there are more possible approaches. Nevertheless, the situation is not without any constraints.
You see, since two existing creases collide at 135 degree-angle, the angle between the two creases we are about to add must be precisely 45 degrees. They can be in any position, they do not have to be in line with the grid, but the angle between them must be exactly 45 degrees if they are about to satisfy the Meakawa-Justin theorem.
Of course, these new creases, with some other creases on their way, will form additional collision points (C and D).
Now, the crease pattern is a bit more defined but not nearly finished. You see, by adding new creases (previous step), another set of collision points emerge. As always, these points ask for additional creases to assure that the Meakawa-Justin theorem is satisfied. So, the procedure repeats.
Again, at point D, three creases collide, so point D is fully constrained. Meaning we have to add only one crease, whose position is fully defined. If the Meakawa-Justin theorem is to be satisfied, for the additional fourth crease, there is only one position available (look at figure 6).
Unlike point D, point C offers more options since only two creases are present so far. But if you compare figures 5 and 6, you will realize that point C is literally the same as point B. Again, two creases collide at 135 degree-angle. Therefore, two additional creases have to be added, precisely as was done in point B. But this time, let’s position them differently (figure 6). As you can see, new creases are rotated counterclockwise if compared to the similar creases at point B.
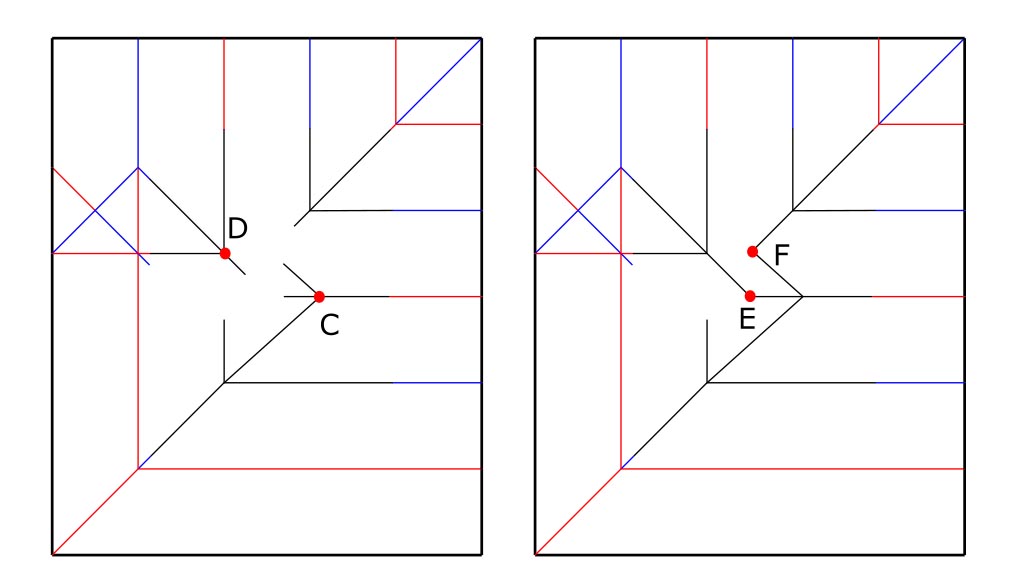
In the next iteration, we have to deal with points E and F. Here, the situation is a little bit different because neither of these points is fully constrained. They both have only two creases. Again, the position of two additional creases at these points is up to you (completely your choice). Only, what you have to take care of is to ensure that the Meakawa-Justin theorem is to be satisfied.
To simplify the crease pattern both points will get two additional creases as they are supposed to. But this time, one crease will be shared between them. Look at figure 7. In other words, we have connected points E and F with one additional crease. At that moment, creases in both points are fully constrained, since only one crease has to be added at each point. And as you know, if the Meakawa-Justin theorem is to be satisfied, these creases can assume only one possible position.

Finally, we have to extend all remaining creases and everything will fall in place nicely. The newly obtained crease pattern obeys the Meakawa-Justin theorem in all its nodes.
Finally, it is time to put the Kawasaki-Justin theorem into consideration and make a mountain-valley assignment. The job should be fairly simple since most of the creases are already defined. The final result is shown in figure 8.

Other possibilities
Now, the thought-provoking part. You see, if compared to the crease pattern in figure 1, our just constructed crease pattern is significantly different. Yet, the folded models are the same (compare figures 1 and 8).
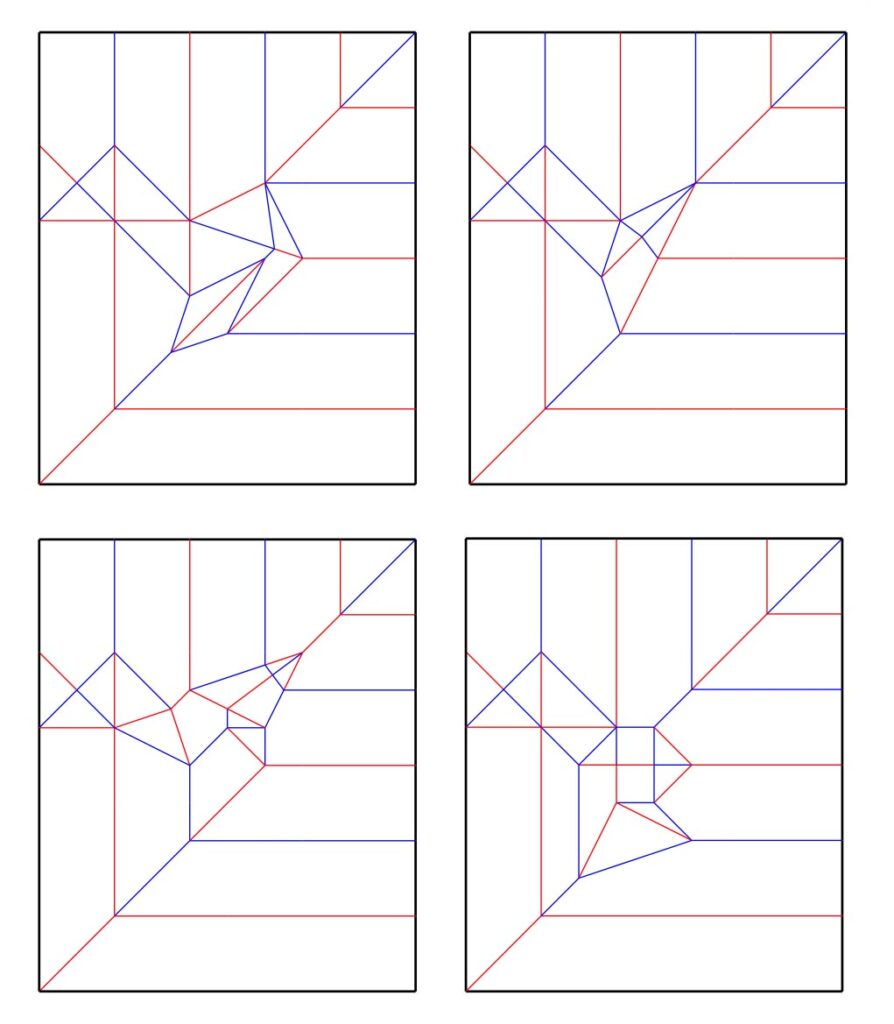
The difference arises from the fact that during the construction process we have made many different decisions. Or to rephrase it, the fact that we have made so many decisions during crease pattern construction implies that if we have made different decisions, the crease pattern would look significantly different. And indeed they would. In figure 9, you can see four additional crease patterns. All of them were constructed in the same way. The only difference is that we made different decisions during the construction process. That is all.
So, if you try, you can come out with yet another, completely different crease pattern. And still, that crease pattern will, when folded, result in the same final model.
I hope that now you understand the idea behind of the perimeter theorem. Even though it is omnipresent and fits perfectly with other origami theories, it is hardly ever recognized as a reason for some of the most complex crease patterns.